In the case of antique and vintage buys there is a lot of history that goes with those pieces, and you can just imagine all stories that go behind your find. With thrift buys these are really great for using as intended, but you will also feel great about painting, upcycling, and reworking your item because the cost is so low!
For all thrift and vintage shopping, it’s essential to know what you are looking for and once it is purchased, what you will do with it! Don’t buy something just to buy it, make sure you will have a place to display your treasures when you get home!
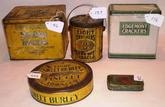
I have/will continue to post my vintage and thrift finds as they come my way, and how I incorporate them into my home. You may be surprised by some finds and I hope it inspires you to buy antique/thrift! Below is the essential guide to buying antique, auction, thrift, and rummage. I have acquired this knowledge through a childhood and adulthood of being dragged to vintage and thrift stores by my parents. Now it has become a passion! I hope these tips and tricks will help you on your adventures!
Antique Stores
What is sold in an antique store is generally………old. These are pieces that have value for their age, quality, and collectability. Typically, the rarer the piece and the better the condition, the more money it will cost you. This is one of the pricier options to buy your accessories and pieces. The benefit is you will get something truly antique with a lot of history.
When looking for an item it can be overwhelming to look through all the glass cases and displays filled with stuff, you will be looking at literally hundreds if not thousands of items. It is really important to know what types of accessories, colors, etc. you are looking for. This is really helpful to have in mind so you can use a scanning technique when looking over the cases and booths. Quickly scanning all the items will be a real time saver for you!
The way typical antique stores operate is that they are composed of different sellers or dealers. Each seller has their own booth or a nook in the store, so all similar or like items will not be placed in the same area. Don’t be afraid to ask if you are looking for a particular item, if not happy scanning!
Pieces that you look for in an antique store should be purchased for their unique look, feel, antique value, or sentimentality. Since antiques are the priciest way to buy used I do not recommend altering these items. It is senseless to spend $50 on a figurine that you will just end up spray painting white. For those items that you are going to alter buy thrift or rummage sale. It’s also very important to check the prices. Sometimes one small thing about an item makes it really valuable, such as the year or the color of a feature, and if you are purchasing the item for aesthetics and “cuteness” rather than for it’s antique value you can often find something similar at a cheaper price.
Auction
An auction is where items are up for sale do not have set prices and are sold to the highest bidder. The content of the auction items can vary so read the description and know what types of items are up for bid. If you had your heart set on vintage furniture you will be outta luck if you show up at a farm tool auction.
Come ½ hour early so you can look over, touch, and hold all of the items you are interested in bidding on. It usually varies from auction to auction, BUT typically once you win a bid it’s yours and you can’t change your mind if you find something you don’t like about your piece after the fact. You will usually get a sheet of all the items up for auction. Use this sheet to mark items you are interested in. It is easy to tune out of the bidding (an entire auction can last for HOURS!) so by circling the numbers of the items you want you can keep checking in to see if the bidding is close.
Set a price, know what you are willing to spend on an item and stick to it. It is easy to get caught up in a bidding war and spending a lot more than you had planned on. Also, make sure to do your homework on your items and make sure you know what they are worth! Usually you can get a good deal and will pay less than antique store price, but there are those instances where an item goes for considerably more than it is worth.
Sit in the back. This seems a little contrary because for everything else the “good seats” are in the front. If you are in the back you can see everyone who is bidding on an item and how many people you are bidding against. You must have a number to bid, and you hold it in the air to place a bid. There will usually be a person that will either point or gesture at you or say “YEP” really loud to indicate that they have taken your bid. If you are in a bidding war after this generally a nod to the auctioneer will indicate that you are upping the ante. If all else fails just watch everyone else and you will pick it up fast.
The auctioneer (who talks VERY fast so pay attention) will typically start out with a higher number, so avoid holding up your number to bid at the very beginning. The numbers will keep going lower and lower until someone makes in initial bid. I think it’s best to let someone else have the first bid so you don’t start your bidding to high.
Very important: If an item up for bid says “choice” that means that the bidding is for only ONE item, your choice, not both or all items. Typically if you win the bid for choice you will have the opportunity to buy the other items in the choice for the same price.
Goodwill/Thrift Stores
Items found at thrift stores are used items that people have donated or sold to the store. However, at some thrift stores you will be able to find new items in the packaging. Typically these items aren’t old enough or have enough value to be considered antiques, but sometimes you can find hidden treasures.
I will first say that it takes courage to walk into a thrift store. Yes, it may smell weird in there. Yes, some people have a phobia of used items and only want new. And yes, you may encounter some unique individuals and ugly sweaters in the store. BUT concentrate on the good prices and deals you are getting, and after a couple trips there you will get butterflies in your stomach at just the thought of going!
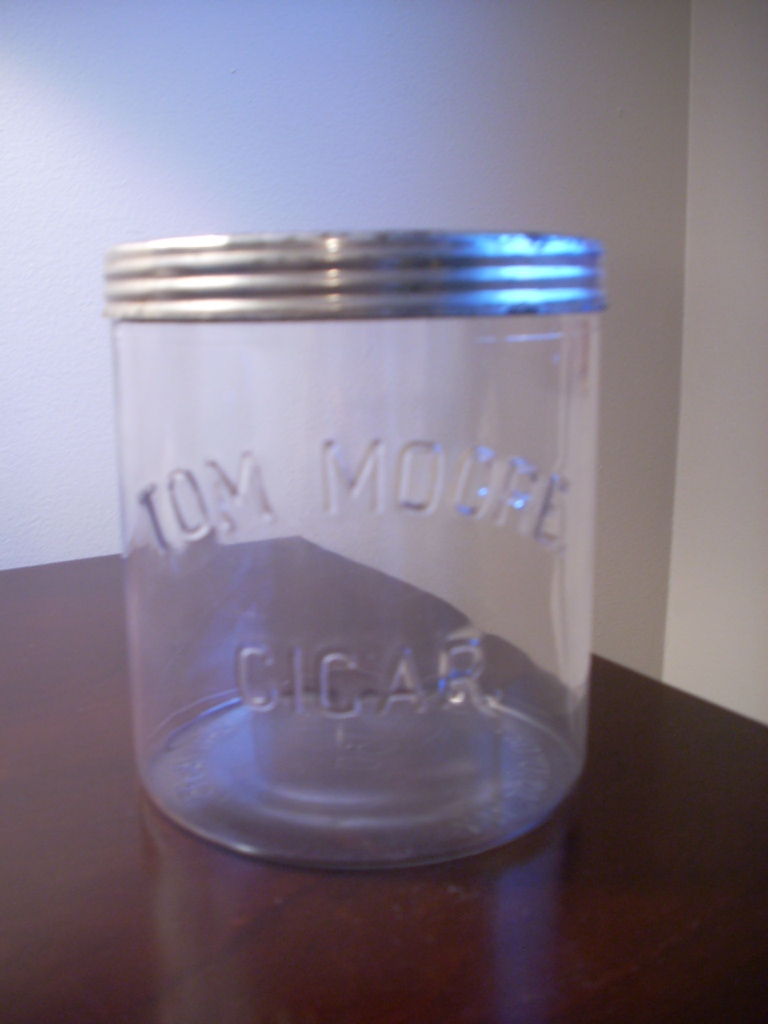
Thrift stores are a GREAT place to get items that you want to repurpose, paint, tear apart, etc. because the prices are also great. I found an amazing chair (which I couldn’t buy because it violated my rule of “you need someplace to put it”) for $3.00!! Some new upholstery and it would have made an amazing desk chair! Thrift stores are also an excellent place to get glassware. You will often find jars, vases, cake covers, etc. at excellent prices. Also, a lot of people, as I mentioned before, only like new items. These are the people that continuously buy new accessories and if you’re lucky give their “old” (meaning older than 2 years) items away. You can buy these items for a great price at Goodwill and benefit from their foolishness.
One thing to consider when shopping thrift is what neighborhood the store is in. Items donated or sold to the thrift store typically come from the people living in the community. A poor community may have less “good buys” than a neighborhood that is more wealthy.
Most times you can bargain and negotiate at these stores and get them for slightly less than sticker price. Also, some stores have sales on certain days for certian types of items so it is good to get to know the workers and find out what days the deals are offered.
Rummage Sale
This is probably the cheapest way to buy. People are looking to get rid of there stuff and are more likely to give you a bigger discount and make better deals for you to haul their stuff away. However, sometimes you do run across sales where people think all their items should be worth their weight in gold. Bargaining with these people is typically senseless. They key to getting a good deal is bring cash, and by that I mean small bills and change. It's easier to bargin when you have smaller amounts than it is to talk your guy down $5 and then having to ask for change from your $50 bill. Also rummage sales may not have enough change to give back to you and you will either have to pay more or not get your item.
Like buying at Goodwill, you can feel good about painting, cutting, chopping, re-doing your pieces because you don’t have too much money invested. With rummage sales also adhere to the neighborhood rule. Those neighborhoods with wealthier people will be able to afford items with more quality therefore selling their used quality items to you! And like at auctions, make sure to read the description in the newspaper or online. If the advertisement is for baby clothes and toys, it is unlikely you will find the cheap furniture you are looking for.
It is essential to go early. To get the deals you have to be the person lurking five minutes before the thing opens. Your creepiness will pay off in the form of cheap bargains. It is also important to pay attention to what days the sale is being held. If you are planning on going on Saturday morning and the rummage sale started on Friday, no matter how early you get there on Saturday the good stuff is probably already picked over. For your rummage sale adventures, it is always good to have a plan of attack. Map out a route of sales in the same area and conquer! It saves time and energy to hit all the sales in one area before moving onto the next area. Otherwise you may find yourself running across town for each sale you go to!
I hope this guide helped and happy thrift and vintage shopping! Does anybody else have any tips and tricks they would like to share?